Thursday, August 25, 2011

Back to School means back to Baking


WOW....less then 2 weeks till school starts again (and I go back to work).  Its been nice having time off with the kids.

I had great plans for this summer, tons of new recipes I wanted to try out, but the truth of the matter was....It was too DARN HOT!!!!!  Most days I couldn't even take the kids out to the park till about 7pm and even then they were sweating after running around a few minutes.  Add to the incredible heat the fact we live in a small apartment with no air-conditioning.....I wasn't going to go anywhere near the oven.

Now with the last days of summer upon us, the temperature has dropped to comfortable levels and I have dared to dream about cookies, bars, cakes and treats again.

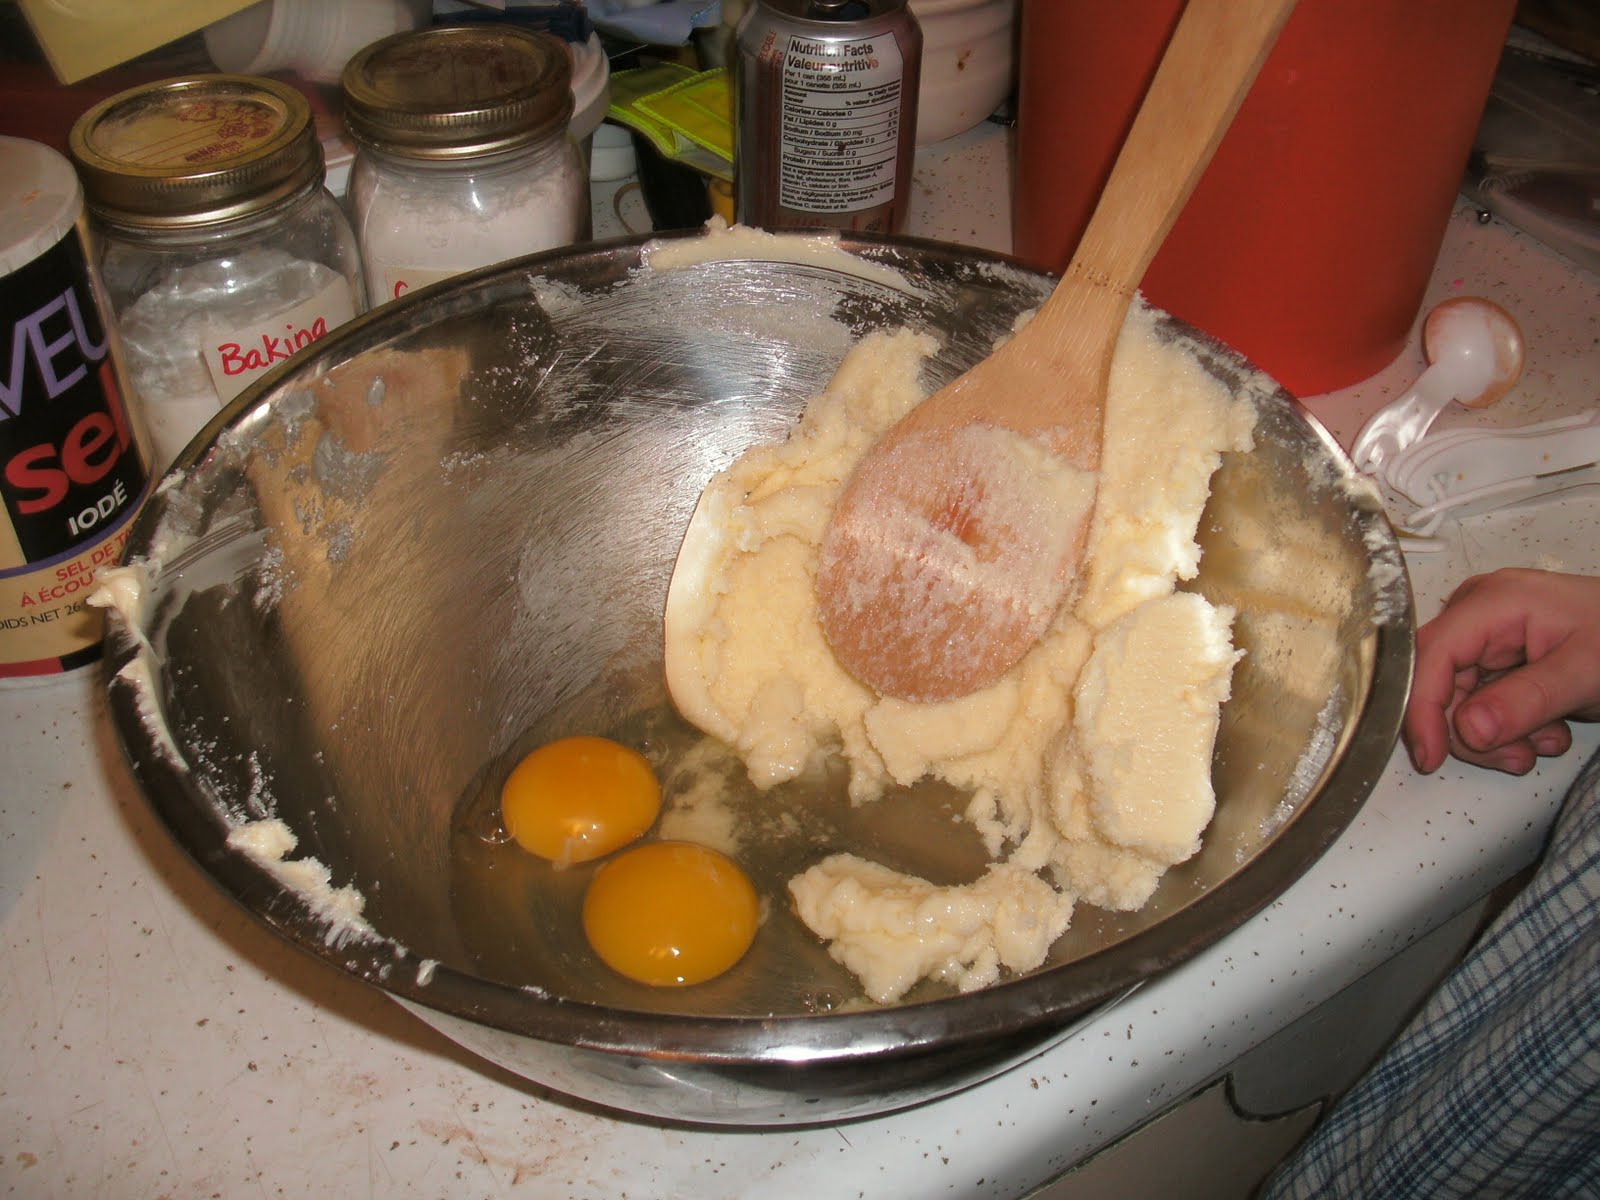
So this afternoon I pulled out my big mixing bowl and got set to bake.  The kids were in raptures...."Mamas baking again!!!...what are you going to bake? ...Snickerdoodles...No!  I want Chocolate chip cookies....how about cupcakes?...we want to help....."

"well actually" I replied, "I'm making muffins to put in your school lunches"...........................................
..........."hello?....kids?...........where are you going?...........<sigh>

Well I have to admit muffins might not hold the glammer of other treats but considering that the number of muffins now on the cooling racks is quite a bit lower then the number I pulled out of the oven, I think the kids have gotten over their disappointment.

I have yet to find a muffin recipe that I am totally happy with so I was searching Tasty Kitchen  which for those of you not familiar with it, is the addictive, go-to site for all recipes hunters, created by the Pioneer Woman (aka Ree Drummund).  As I was searching, I came across a posting for a basic muffin mix which you can do endless variations on.  As the poster mentioned that she works in a bakery and this is the recipe they use, I decided that this needed testing out.  


I made 2 types today, a basic banana, and a pumpkin spice.  The hardest thing about the recipe is making sure your consistency is fine after adding your "variations", which is just a matter of not adding the milk until the end and adjusting the amount accordingly.  Overall the recipe is very simple and the muffins turned out good so it is something I will continue to play with.  (the kids have already put in requests for blueberry, chocolate chip, carrot and apple spice and I have some lemon and cranberries that I want to use)


Basic Muffins with Variations    -   makes 12 (med)

2 cups flour                          1 cup sugar
2 tsp baking powder             1/2 tsp salt
1 egg                                    3/4 cup milk (or as needed)
1/4 cup plus 2 tbsp oil           1 cup optional variation ingredients

sift dry ingredients.  Add wet and any additional ingredients and stir until moistened.  Scoop into greased muffin tins and bake at 400 for 20 -25 minutes.


For the banana I doubled the recipe, added 5 over ripe mashed bananas, cut the sugar to only 1 1/2 cup total, used only  1/4 cup oil and 1 cup milk.  It made 24 medium muffins.


For the pumpkin, I doubled the recipe, added one can (about 1 1/2 cup) pumpkin puree, 1 tsp pumpkin spice and 1 tsp cinnamon.  I ended up adding an additional 1/4 cup of milk (on top of the doubled amount).  This made 24 medium and 12 mini muffins.  * next time I think I will try adding a bit more milk.

Original Tasty Kitchen Post      

Wednesday, June 29, 2011

The Rainbow Realta (aka the stash-busting blanket)


So in between all the baking I have done over the last 2 weeks, I have been trying to complete another afghan.  Back when I was completing this blue afghan  as a gift for my daughters teacher, my son decided that he  wanted a blanket for his end-of-the-year gift for his teacher too.  He didn't want a boring blanket though, his teacher "liked colours!".

I was on board with that, after all, I knew I had more then enough colours in the various yarn stashes around the apartment, and I had the perfect pattern for the job.


I found the pattern very easy to follow and it is very versatile to whatever colour pallet you have to work with.


The Realta afghan  created by the very talented Gingerbread Lady.  She is also the creator of the Kitties in a Row Blanket  that I made. ( shown in this post).  Check out her blog.

Friday, June 24, 2011

Mini Streusel Coffee Cakes

Well its the calm after the Bake Sale, all there is left to do is clean up the debris in the kitchen and try to ignore my kids pleas to have "just one more cupcake Mama...pullleeeeeze". (and ignore my own inner voice trying to sweet talk me into a strawberry lemonade bar....mmmmmmmmmm....lemons........)

The turn out this year for the Fun Fair was excellent even with all the black clouds looming over us. When the the deluge started I think we only lost about a third of the crowd, with the rest making a beeline into the school gym (which did wonders for bake sale table as there wasn't much of anything else for them to do while they waited for the rain to stop!)  And what a glorious feast we had laid out for everyone...cupcakes galore,cookies, pies, strudel, cakes, tarts, fudge, loaves, and squares of all sorts.

I only grabbed a few quick shots of a few of my favorite inspirations for future baking .

Cookie Monster!!!!!!! ( C is for cookie, that's good enough for me...)

At the beach  (we also had these made in Ice cream cones)


Formal strawberries.  These were such a huge hit.
  Such talented people!!!  

So as I was planning what I would bake for the sale, I rediscovered some mini baking pans that I bought a while ago.
They're round so i didn't want to do a loaf because i thought it would just end up looking like a short, squat muffin.....individual cinnamon rolls?...an idea but i didn't really like that either (maybe another time).  So Somehow i came up with mini coffee cakes.  

Yummy!!!!!!!!!   So much so in fact that my kids kinda ate their way through most of the first batch I made and so I had to do 2 more batches for the sale.

Streusel Coffee Cake     Recipe adapted from "Company's Coming - Muffins and More by Jean Pare"

butter or margarine   1/3 cup
sugar                        1/2 cup
egg                           1
flour                          1  1/2  cups
baking powder          2 tsp
salt                           1/2 tsp
milk                          3/4 cup

Cream butter, sugar and egg

In separate bowl combine flour, baking powder and salt.  Add to creamed mixture, alternating with milk.


Streusel Filling
1/2 cup brown sugar
1 tsp. cinnamon
The original recipe didn't call for this but after the first batch I decided they needed something extra.  Microwave the mixture until its runny enough for you to spoon/drizzle into batter

Fill greased liners about 1/4 full with batter then drizzle filling in.  Cover with more batter


Topping

packed brown sugar    1/2 cup
flour                            2 tbsp
cinnamon                     1 tsp
melted butter               3 tbsp
mix topping ingredients and sprinkle over the top of each cake.  Bake at 350 F for about 25 min ( or until lightly golden brown and toothpick comes out clean)  Makes 7 mini cakes.

The cake on the right is from the first batch.  I filled it slightly less and I smoothed out the batter before adding the topping.  The left is the second batch.  I filled it more and left it lumpy.  I like the look of this batch better.

Another new recipe that is going into the keeper binder!!!

I also made Snickerdoodles, King Squares and Lemon Loaves for the sale but didn't take pictures as I was doing them so those posts will have to wait for another  baking day.

Tuesday, June 21, 2011

Strawberry Lemonade Bars

So the kids' school is having their annual Family Fun Fair this Thursday and one of the highlights is the Bake Sale table.  I'm on the Parent Council which oversees this event and for the last couple of years I've had the pleasure of organizing the bake table.  I have and will be making lots of goodies for this event but I'll break each one down to its own post over the next few days.

Today I tried something new.  Strawberry Lemonade Bars.


(sorry for the camera phone shots, but my camera is being temperamental and is refusing to work even with brand new batteries.)

I've made lemon bars many times (and in fact I will be doing that post later)  but while looking around on bakebakebake  I came across this post for Strawberry Lemonade bars.   Hmmmmmmm......2 of my favorite things. 

I did make some adjustments to this recipe for this round of baking to take advantage of some strawberry jam that i had made with the kids last summer that never set (but kept in the freezer just waiting for this recipe!).  For this batch I used the jam and meant to omit the sugar (as the jam is full of it) but forgot and added the sugar anyways.  The end result?  I personally found it a bit on the sweet side although every one I got to play guinea pig  be a taste tester says they tasted great and not too sweet at all.

Also the recipe in the link is a halved recipe which was fine for me as I wanted to test it out, however i found that there just wasn't enough dough for the crust so i made a second batch of dough.  I used a brownie pan instead of the 8 x 8 recommended.  I left the filling as the halved amount.

The following is the recipe as I made it this time.
Crust - 4 tbsp sugar
           1/2 cup margarine (you could of course use butter)
           1 1/2 cup flour
            1/2 tsp salt


Cream butter and sugar


add flour and salt and mix until crumbly.  Press into tin foil lined brownie pan. (lining with foil allows you to lift the whole thing out of the pan to make cutting more easier) Bake at 350f/175C for 15-20 min or until edges are slightly golden brown,


  Filling - 1/2 cup lemon juice ( I used juice and pulp from 2 large lemons)
               zest from both lemons (about 2 tsp)
               1/4 cup strawberry jam mush :o)
                1/2 cup + 2 tbsp sugar
                2 eggs
               2 tbsp flour
                1/4 tsp baking powder
                1/8 tsp salt
             

blend first 5 ingredients, in separate bowl blend flour, baking powder and salt then add to lemon mixture stirring until smooth.  When crust is done, pour filling over it and return to oven for another 20-25 min or until filling is set.  Let it completely cool before moving to fridge.  Let chill a few hours to really set it.


I also had a few mini tart shells on hand and I filled a few of those.  Although I liked the tart shell I think I prefer the taste of the bar crust.

All in all this is a keeper and I will keep you all updated on any further tweaking that I do to it.  If any of you give it a go, I would love to hear from you about how you did.

Wednesday, May 25, 2011

Baking with the Mini Chef

I've been meaning to do some baking but the last couple of weeks have seem to have gotten away from me.  Today however was set aside for baking no matter what.  Tomorrow is the last day of "little school" for my son and he informed me that he wanted to give his teachers flowers and cookies to say goodbye.  To be exact, he wanted chocolate chip cookies and snickerdoodles. 

Baking with kids can be alot of fun...and alot of mess....and you have to resign yourself to the idea that the end result will not be as pretty (or sometimes, as edible) as what you can bake on your own.  My little guy tends to get bored with the process and wanders off until its time for the taste tester.  Today however I was pleasantly surprised that he stuck through it from start to finish with both cookie batches....and then suggested that maybe when he grows up he will be a "cooker".  WHOOP!!!!  That's my boy!!!!!


Chocolate Chip Cookies (kids choice)

Adapted from Company's Coming - Cookies by Jean Pare

1 cup butter                  1 1/2 cups brown sugar
2 eggs                          2 tsp. vanilla
2 1/4 cups flour            3/4 tsp salt
1 tsp baking soda         2 cups chocolate chips
1 1/2 tbsp cinnamon


Cream butter and sugar together, then beat in eggs one at a time.  Add vanilla.


Sift together flour, salt, baking soda and the kids "secret weapon" cinnamon.  Stir into sugar mixture.


Add chocolate chips (or whats left of them after the taste tester does some quality control)


 I roll them about the size of Timbits ( for non-Canadians that would be about a 1 1/2 inch ball) and then flatten slightly.  Bake at 350 F (180 C) oven for 10 to 15 minutes. (until bottoms are slightly golden).  Makes about 3 dozen.


Sunday, May 8, 2011

Kitty Cats and Bunnies

Well finally the nice weather has decided to join us so the kids and I have been spending lots of time at the park.  Yipee!  I've also been able to get a fair bit of Spring cleaning done...I don't know if it's just me...but I do my best cleaning when its bright and sunny.  If its raining ...forget it. 

So with one thing and another I haven't spent much time in the kitchen.  I did do a couple of batches of various berry muffins for the kids lunches but since they look like every other muffin on the planet I won't bore you with them here.  I did do some baking for Easter.  Mini Carrot cake  (Forgot to take a piccture) and for all the kids I made Brownie Bunnies Pops.


Yes, that is a snowman hiding behind them....my cousin has already teased me about still having that out at Easter....but thats not the worst bit I'm afraid...Mr. Snowman is also filled with my kids Halloween candy!!


So I haven't been baking but I have been continuing my stash-busting efforts and have just completed this stroller blanket.  Its in WW yarn so it can hold up to trips to the park and such.  I used the Kitty Afghan pattern that I found on The Adventures of the Gingerbread Lady although I did my final round different then hers.  (at 2 am I just couldn't follow the instructions..not her fault... so just did a simple 2 DC in each space going around...)

Pattern can be found here:   kitties-in-row-afghan

Thursday, April 28, 2011

Goodbye Mrs. A, we'll miss you

Well I know I said I wouldn't be the type to post non-stop, but today is a bit of a special case.  Yesterday I found out that my daughters teacher is leaving tommorow.  (She was only filling in for another teacher who is now coming back from Mat. leave).  I'm not sure how I missed out on knowing this and I feel bad.  She is a great teacher and I know how hard it will be for my daughter to adjust to this change, this far into the year.

So anyways  yesterday after school my daughter makes this announcement and then says she wants to give her teacher something special to say goodbye.  2 days notice!!!!  Ack!!!!

Luckily I have recently come to grips with my yarn addiction and in an effort to reclaim my closets i have started to do some serious stash-busting.  (hey 8 large rubbermaid totes and 3 garbage bags of yarn take up ALOT of space you know).  So I have a couple of afghans on the go.  Just finnished one of them tonight with time to spare. (ha!)  Its a good size for a couch throw, as my daughter says, its a good cuddle blanket for her teacher to share with her husband.  I hope she likes it.


The pattern is one that I just ended up liking after about half a dozen false starts.  The finished size ended up being approx. 4 ft x 5 ft  and I used 2 - 400gram balls of Stylecraft Aran Knitting yarn (80% Acrylic 20% Wool)  I bought the wool probably about 15 years ago or so (I told you my yarn stash was bad...)

Chain length desired
Row 1 - DC in each chain stitch
Row 2 -chain 4,  skip 1st st then TRC through both loops (whole row is done through both loops) in next 2 sts, * skip one st, TRC in next 2 sts, TRC into skipped st. * ( * forms cluster)  Continue clusters along row until last 4 sts.  Skip one stitch, TRC last 3 sts. Turn
Row 3 & 4 -DC straight across crocheting into front loops only.

Repeat rows 2-4 until desired length is achieved ending with Row 3.

Take time to stop and smell (or eat) the flowers

For Christmas last year my BF bought me the Wilton decorating classes.  For the most part we just took it as a fun night out and goofed around abit more then we should have but I did come away with some neat tricks.  Flowers being one of them...which makes my daughter very happy.  Case in point...her last birthday cake.


The only reason more flowers didn't end up on the cake was that we ran out of time and had to get ready to leave for the party location.  If she had had her way the whole cake would have been covered.


Least you think however that I can't be more restrained,


and my favorite flower to make...roses

Let them eat (cup)cakes

Here is just a few random items I have made in the last year.....I really need to remember to take pictures of everything I do
Marshmallow flowers colored with jello powder

Chocolate Frog Prince Toppers with free-hand crowns added

Chocolate Princess toppers with free-hand hearts added
(I used my wedding topper mold and just "ahem" cut away the groom)

Chocolate cupcakes with chocolate icing "mud", Oreo crumb "dirt" and gummy worms

Rose cupcakes for Valentine's Day

Welcome

Hello and welcome to Snickerdoodles.   For those of you who are wondering why snickerdoodles, well that is the first cookie which my mom allowed me to make completly on my own back when I was a kid.  It was the name that got my attention and today it is my most requested cookie for get-togethers and orders.  As I branch into more of a at-home baking business I thought it was more then fitting to name it Snickerdoodles.

This won't be the kind of blog with minute to minute updates and stories...I'm just not that kind of gal....this will be more for me to showcase my baking for family, friends and clients.  As I am also a yarn-a-holic who loves my crochet hook as much as my mixing bowl, there might be the occasional post about my current project.

So I hope you enjoy your visit.... Bri


Snickerdoodles

2 3/4 cups flour                              1/2 tsp salt
2 tsp cream of tartar                       1 tsp baking soda
1 cup butter                                   1 1/4 cup sugar
2 eggs

1/2 cup sugar mixed with 2 tbsp cinnamon for topping (more or less cinnamon can be used as per taste)


Cream butter, sugar and eggs


Sift dry ingredients (except topping mix) together


blend dry ingredients into creamed mixture.  You want a nice soft dough that you can roll into balls.


I make the balls about the size of timbits (Approx 1 1/2 inches) roll balls into cinnamon/sugar mixture. 


Flatten slightly on tray before cooking, this will give you a nice cookie with a bit of crunch on the outside and still soft on the inside.  Bake at 350 F (180 C) for 8 - 10 min.  *Just until bottoms start to turn golden...keep a close eye as they can over brown very quickly.


I remove the cookies to a cooling rack as soon as I pull them out of the oven to prevent them from further cooking on the hot tray.  Makes about 3 dozen cookies.